
Terras do Crepúsculo — Guia do mapa de Lowanro
Quando uma Batalha do Crepúsculo começa, os Jurados de Sangue são convocados para as Terras do Crepúsculo. No teste de rede, cada partida ocorria numa só terra: Lowanro — um campo multicamadas de ruas, marcos e natureza. Esta guia explica a estrutura do terreno, os traços regionais que importam a meio da partida e como ler o mapa para perder menos tempo e acumular mais Virtude antes da poda do graal.
Última atualização: 25 de outubro de 2026
As Terras do Crepúsculo
Uma terra, muitas camadas. Lowanro é uma cidadela vertical: a praça do relógio ancora o centro, o bairro da catedral vigia os terraços altos e as ruas exteriores dissolvem-se em grutas, floresta e margem do lago. Explora livremente para fortalecer os Jurados e acumular a Virtude necessária à sobrevivência. As rotas que parecem seguras costumam esconder emboscadas de terceiros nos estreitos: trata cada marco como recurso e como combate iminente.
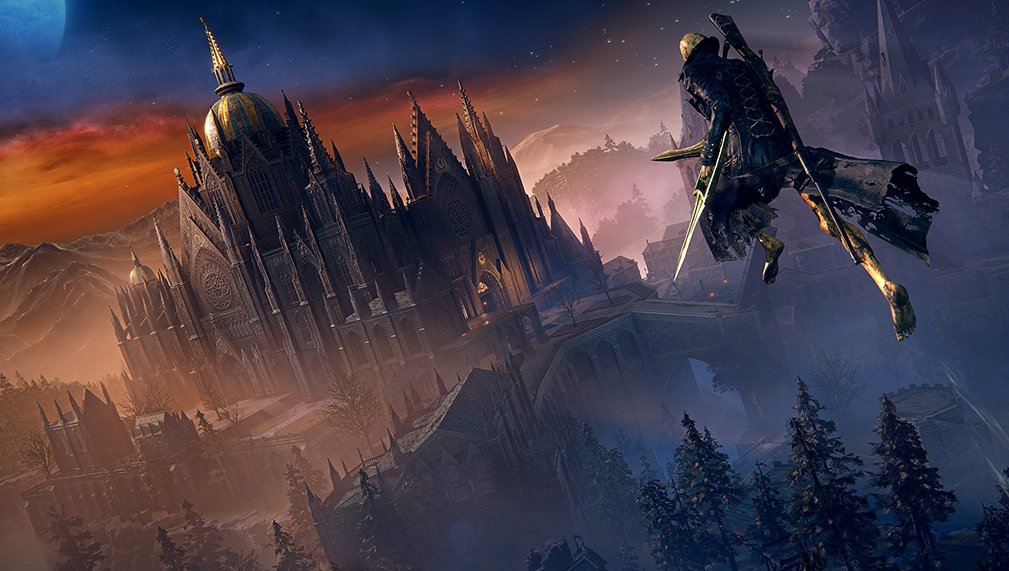
Lowanro City
The network test's sole battleground — a city watched over by a towering clock tower and cathedral, with streets spreading around them. Expect frequent multi-team collisions in the plaza because it is the fastest path between spawn quadrants and several upgrade spawns.
Multilayered Regions
Beyond the streets, the field branches into multiple regions including a cave, a forest, and a lake. Verticality matters: ledges, stairwells, and rooftops let short-range builds disengage while ranged Bloodsworn hold sightlines from above.
Revive Until You Fall
You can revive any number of times in the Lands of Dusk — until you fail to survive the culling. Because lives are generous but the grail is not, dying late in a round is far more expensive than dying early while you still have time to rebuild Virtue.
Spawn Quadrants
Players drop into distinct quadrants at match start. Early routing choices decide whether you contest a contested furnace, claim uncontested bloodbags, or sprint for golden spires that summon allies — each opening shapes the next two minutes of the round.
Culling Pressure
After each round, the lowest-scoring players are culled. The map itself is neutral, but tempo is not: if you are behind, force fights near objectives instead of wandering the wilderness hoping for isolated PvE value.
Terrain Tells
Look for ritual sites, teleport pads, and chains of light — they telegraph where players will cluster. Use the terrain as a scouting tool: if a region is quiet and empty, the real fight is usually on the other side of the clock tower.
Traços regionais
Vários traços aparecem por fase e mudam com a partida. Vê os ícones e escolhe upgrades ao teu estilo. A rota “segura” costuma encadear dois traços sem se atirar a uma refrega de três equipas na praça.
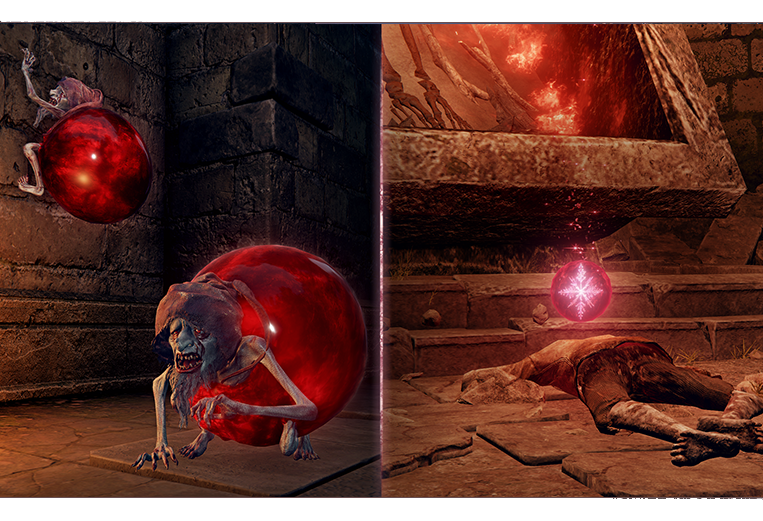
Bloodbag Elder
Bloodsacs wander the land. Defeat them for blood crystals that enhance your Bloodsworn Skills. They are usually contested after the first culling, so secure a crystal route early instead of gambling on a late steal.
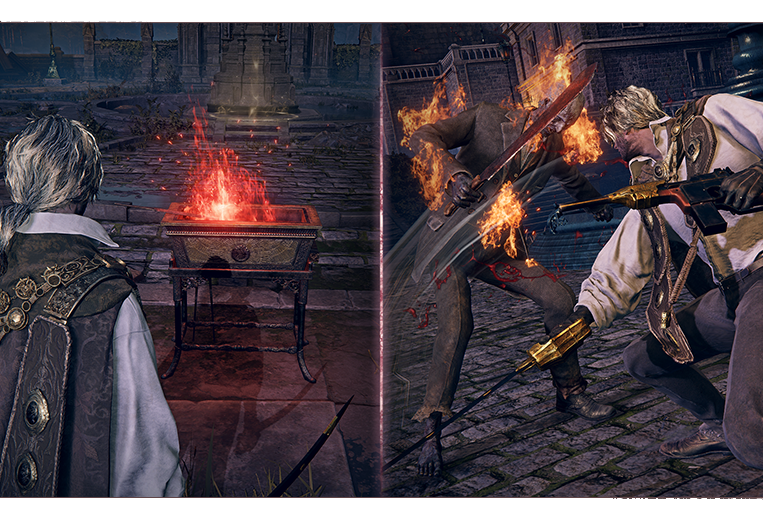
Alchemy Furnace
Imbue weapons with fire and other affinities. Enhancing again at a matching furnace raises the weapon's enhancement level. Stacking a matching affinity is one of the few mid-round power spikes that is not tied to killing other players.
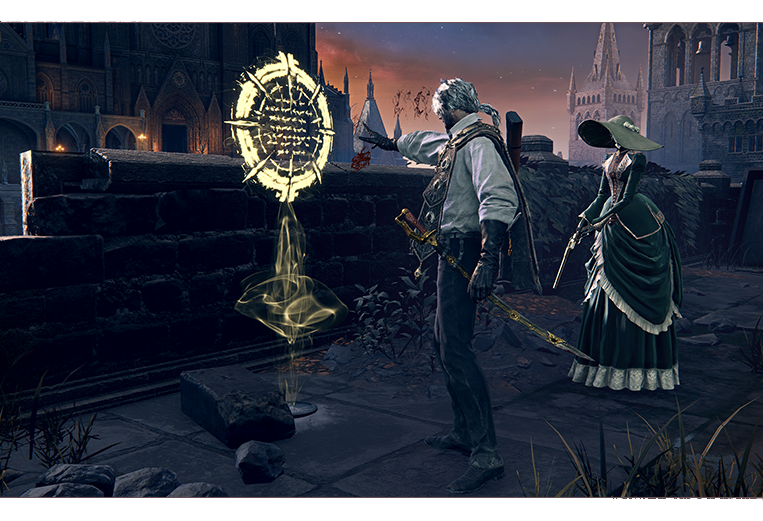
Kin Small Circles
Small kin summoning circles appear — strengthen your compact and grant a large amount of experience to your partnered kin. Pair this with a safe farming loop if your kin is close to a breakthrough.
Golden Spires
Golden spires can summon allies into the field. Treat them as high-value objectives: activating one under pressure often turns a losing skirmish into a stable fight, but standing in the open to channel is an invitation to third parties.
Ritual Sites
Ritual Sites are where Sword Virtue is earned by killing players. If you are building an aggressive scoreline, path past them every phase; if you are protecting a lead, gatekeep the entrances instead of forcing the center.
Teleport Pads
Teleport pads compress the map and punish slow rotations. Use them to escape collapses or to arrive first at a fading objective — then expect someone else to arrive three seconds later.
Ferramentas do mapa e ecrã de info
Preme [+] durante a batalha para abrir mapa e info. É a melhor reconhecimento quando o áudio está barulhento: ícones de objetivos, posições da equipa e contexto de fase sem se expor.
Live Objectives
Track furnaces, circles, spires, and ritual sites as they appear. Icons update with the phase, so re-check after every round transition.
Team Positions
See where your Bloodsworn partners are holding. If two teammates are already committed to the plaza, do not add a third unless you can finish the fight quickly.
Phase Context
Culling windows and match structure reward different routes early versus late. Early rounds favor setup; late rounds favor closing on the final battle.
Quick Ping Habits
Ping before you engage when possible. A one-second callout prevents the classic Lowanro mistake of winning a duel while the enemy team takes the spire behind you.
Sound Cues
Roar conversions, flame arts, and ally summons are loud on purpose. Audio is information: if you hear a fight, decide whether to third-party or complete your own feature first.
Route Planning
Before the gate opens, pick a two-feature loop. Wandering without a loop is how players fall behind on Virtue without realizing they never took a real fight.
Rotas e spots de farm
As guias de estratégia de mapa — rotas por Jurado, timings de forno e cálculo de poda — estão no hub de guias. Com um plano para os primeiros 90 segundos, o mapa parece menos aleatório.
Ver guias de mapa →Capturas e dados de sistemas referenciam materiais públicos da FromSoftware / Nintendo. Layout, análises e recomendações desta página são independentes e não oficiais.